
Bounce list
Review bounce categories, statuses and timestamps under Contact Management.
Platform checked: 2026-11-12 · Guide updated: 2026-11-13Steps have been checked against the live platform. Screenshots are cropped to protect account and customer data.
Before you start
- Have the address or date range ready and distinguish temporary from permanent errors.
Step-by-step instructions
- 01
Open the bounce list
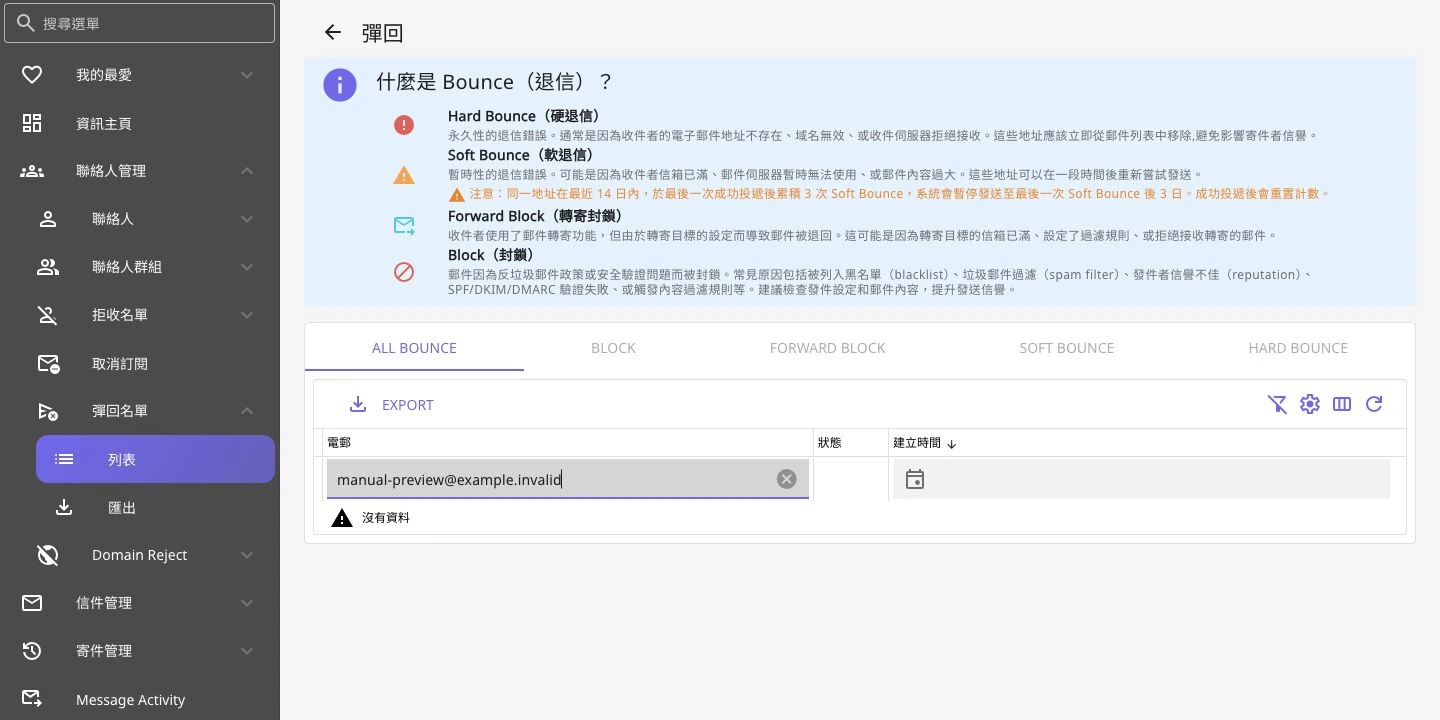
The current entry is Contact Management → Bounce List → List, rather than the separate Reports menu described previously.
 Open full-size screenshot
Bounce categories, guidance and an empty filtered result - 02
Choose a bounce category
The page offers ALL BOUNCE, BLOCK, FORWARD BLOCK, SOFT BOUNCE and HARD BOUNCE. Read the category explanations before choosing a view.
- 03
Read address, status and time
The list shows Email, Status and Created Time. Enter a condition in the email header filter and press Enter, or use date controls, then verify that the results match.
- 04
Export and follow up as needed
Use EXPORT on the page or Export in the navigation as needed. Hard bounces usually require correction or suppression; soft bounces can be temporary. For blocks, check authentication, reputation or content rather than resending in bulk.
Notes and troubleshooting
- The inspected guidance states that three soft bounces after the last successful delivery within 14 days pause sending until three days after the latest soft bounce; successful delivery resets the count.
Need a little more help?
Tell us what you're experiencing.