
Suppress an individual email
Add a single address to handle an individual suppression request.
Platform checked: 2026-11-12 · Guide updated: 2026-11-13Steps have been checked against the live platform. Screenshots are cropped to protect account and customer data.
Before you start
- Verify the request and full email address to avoid suppressing a similar address.
Platform entry Platform screenshots use Traditional Chinese; follow the control names in this guide.
Step-by-step instructions
- 01
Open individual Add
Expand Contact Management → Rejection List → Add, not the ordinary Add Contact page.
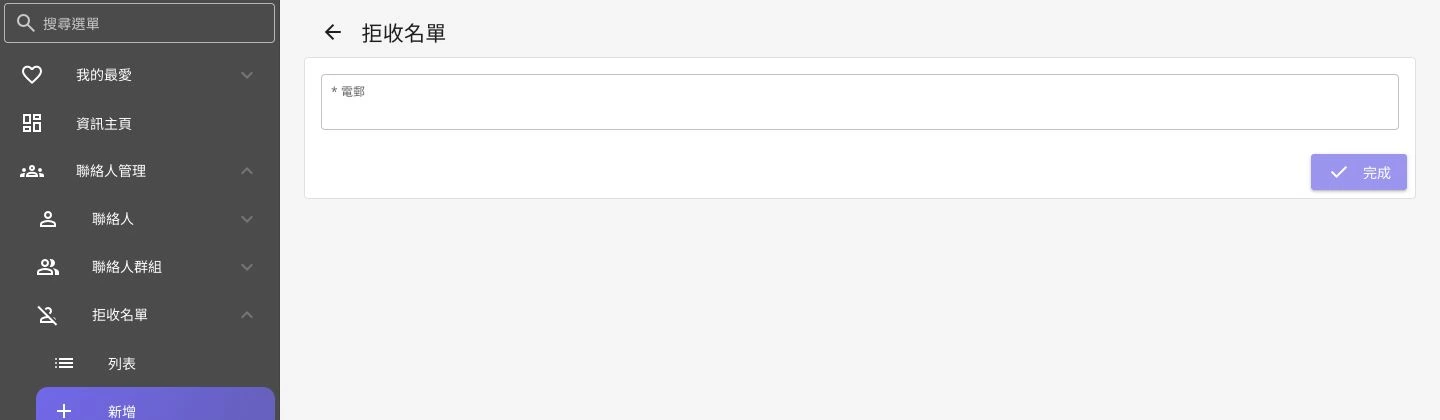 Open full-size screenshot
Add-an-individual-rejected-email form - 02
Enter the full email
Enter one full address in the required Email field and check @, the domain, spelling and spaces. This form has no group or name field.
- 03
Review and select Complete
Select Complete only after confirming that this is the address to suppress. This adds a real rejection entry; do not casually test with a customer's active address.
- 04
Verify in the list
Find the address in Rejection List → List. For many addresses, use the dedicated import flow rather than repeatedly adding the same entry.
Notes and troubleshooting
- Check the complete address before suppression. Verify account authority and the customer's wishes before correcting an erroneous entry.
Need a little more help?
Tell us what you're experiencing.