
Contact import records
Check results in the current import wizard and contact list, rather than relying on the older standalone-report description.
Platform checked: 2026-11-12 · Guide updated: 2026-11-13Steps have been checked against the live platform. Screenshots are cropped to protect account and customer data.
Before you start
- Keep the import file and selected group name for verification.
Step-by-step instructions
- 01
Distinguish upload from import
The current flow shows Upload, Preview, Import and Success. Completing upload makes the file available for preview; it does not mean all contacts are in the account.
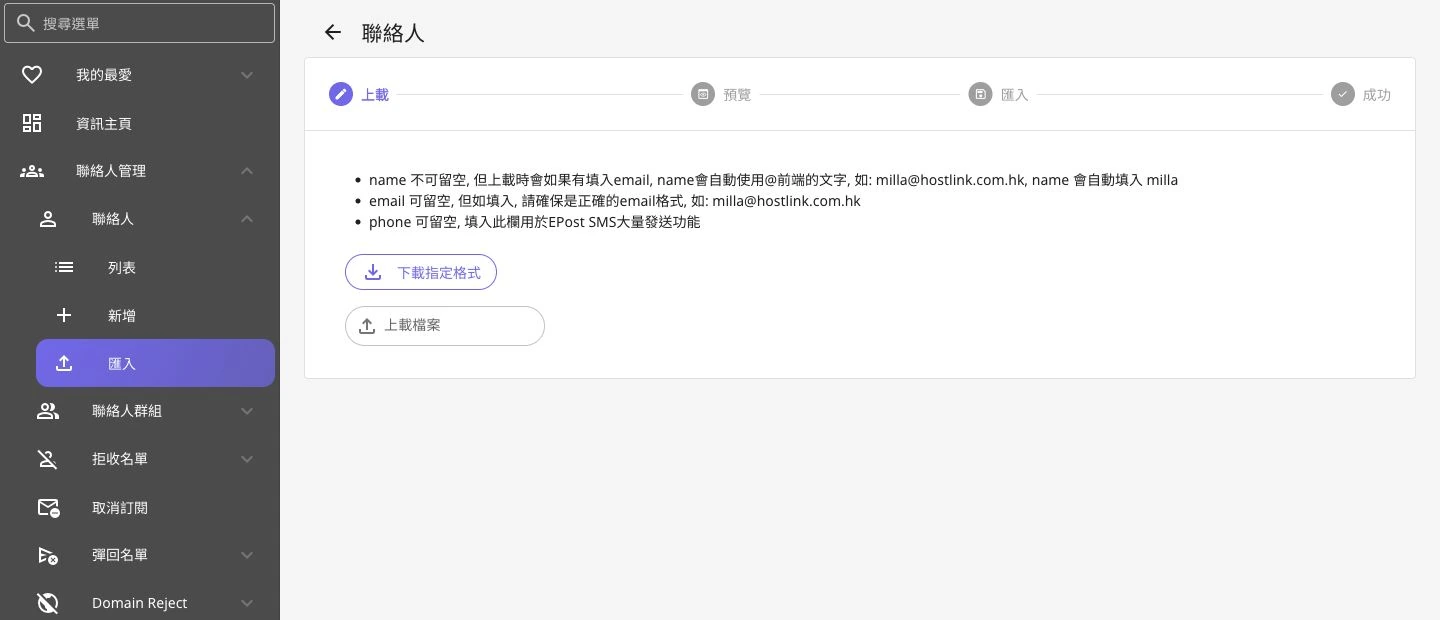 Open full-size screenshot
Contact import format guidance and file selection - 02
Check the preview first
Check fields, rows, the group and the declaration. If anything is wrong, correct Excel and upload again rather than ignoring invalid addresses.
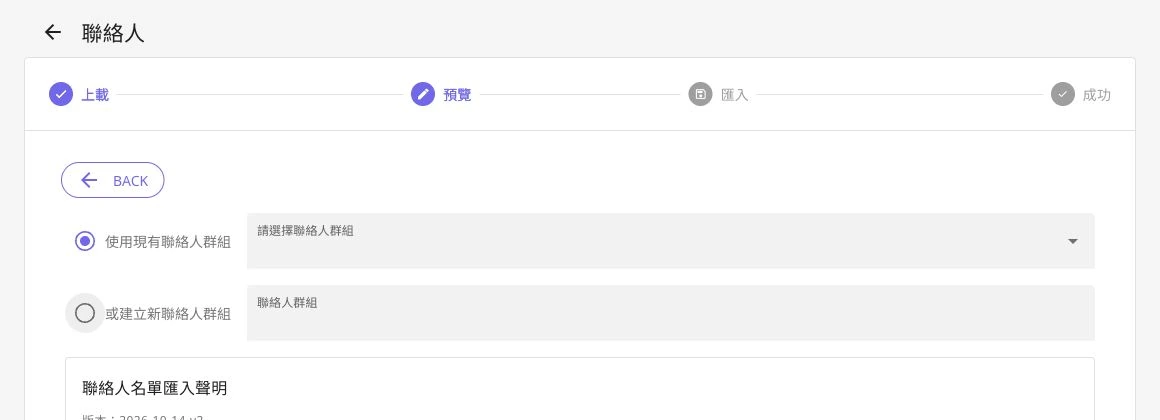 Open full-size screenshot
Existing or new group selection in import Preview - 03
Use the returned result to confirm completion
After submission, read the success or error result. If processing is incomplete or interrupted, check status before retrying. The inspected main menu did not expose the older standalone Contact Import Records entry.
- 04
Verify in the contact list
Open Contact Management → Contact → List and check expected emails and groups. For large lists, sample rows from different parts of the file. Keep the file and errors for support if the totals do not match.
 Open full-size screenshot
Contact-list columns and filters
Notes and troubleshooting
- The older wait-five-minutes / completed wording is not a verified guarantee for the current version; rely on the actual result.
Need a little more help?
Tell us what you're experiencing.