
Schedule list
Review sending arrangements and distinguish schedules, the delivery queue and reports.
Platform checked: 2026-11-12 · Guide updated: 2026-11-13Steps have been checked against the live platform. Screenshots are cropped to protect account and customer data.
Before you start
- Know the sending date, letter and sender you want to review.
Step-by-step instructions
- 01
Open the schedule list
Expand Delivery Management → Schedule → List. Read the page guidance before using Recheck.
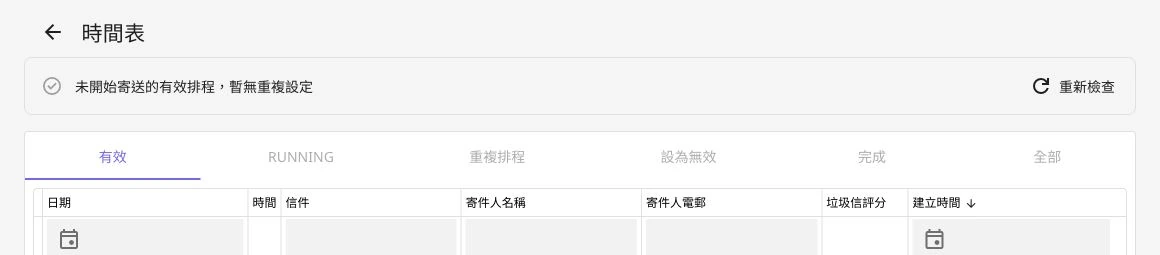 Open full-size screenshot
Schedule-list headers and filters - 02
Check the schedule details
Identify an arrangement using Date, Time, Letter, Sender Name, Sender Email and Created Time. Read the spam score alongside the letter and sender settings.
- 03
Check status before making changes
Before changing or reprocessing a schedule, check whether it has started, finished or is pending. Avoid duplicate schedules for the same audience. Contact support if the interface does not offer the required edit.
- 04
Use the right follow-up view
Delivery Queue shows sending work in progress. Schedule → Report provides batch results, export and date-range controls. The schedule list alone is not the final delivery result.
Notes and troubleshooting
- The screenshot shows headers and filters only, without exposing actual schedules or recipients.
Need a little more help?
Tell us what you're experiencing.