
Email suppression list
Maintain addresses that should not receive campaigns through rejection-list import.
Platform checked: 2026-11-12 · Guide updated: 2026-11-13Steps have been checked against the live platform. Screenshots are cropped to protect account and customer data.
Before you start
- Prepare the addresses to suppress and use the rejection-list template.
Step-by-step instructions
- 01
Open rejection-list import
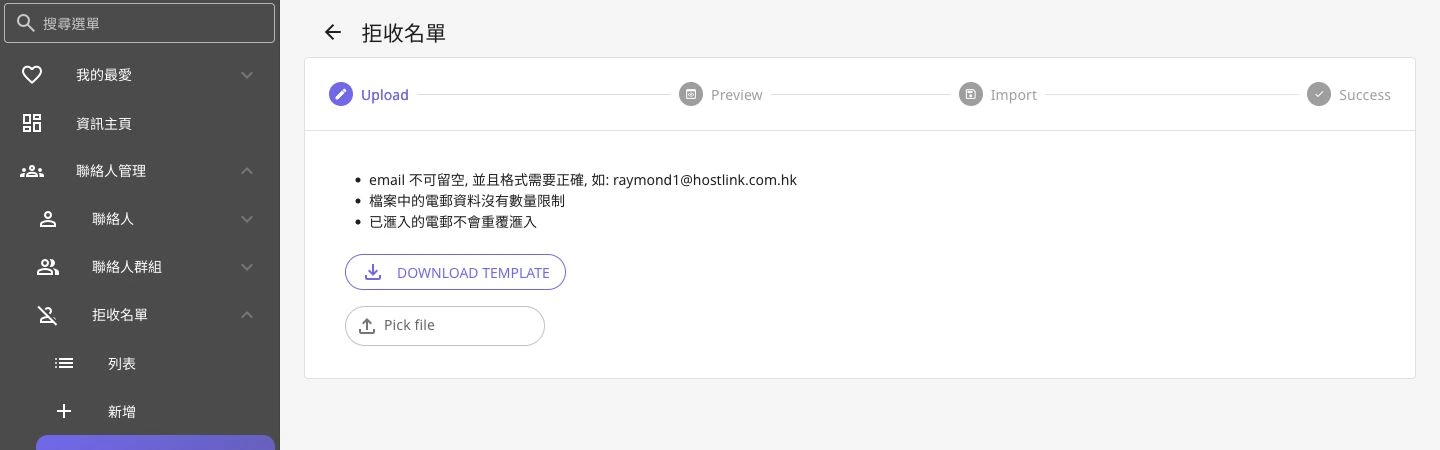
Expand Contact Management → Rejection List → import. The same menu also offers List, Add and Export.
 Open full-size screenshot
Dedicated rejection-list import flow - 02
Download its template
Select DOWNLOAD TEMPLATE. This flow requires a non-empty, valid email value; do not substitute the ordinary contact template.
- 03
Upload and review
Select Pick file. The flow shows Upload, Preview, Import and Success. Review addresses in Preview so you do not suppress intended recipients by mistake.
- 04
Confirm the result and retain records
Follow the platform confirmation steps, then verify entries in the Rejection List. The page states that previously imported emails are not duplicated. Check the list before retrying when uncertain.
Notes and troubleshooting
- Rejection lists and contact groups serve different purposes. Do not remove suppression simply to restart marketing.
Need a little more help?
Tell us what you're experiencing.