
Create an email
Set an internal name and email subject, then choose Builder, a template or an import method.
Platform checked: 2026-11-12 · Guide updated: 2026-11-13Steps have been checked against the live platform. Screenshots are cropped to protect account and customer data.
Before you start
- Prepare the subject, copy, images and destination links.
Step-by-step instructions
- 01
Open Add Letter
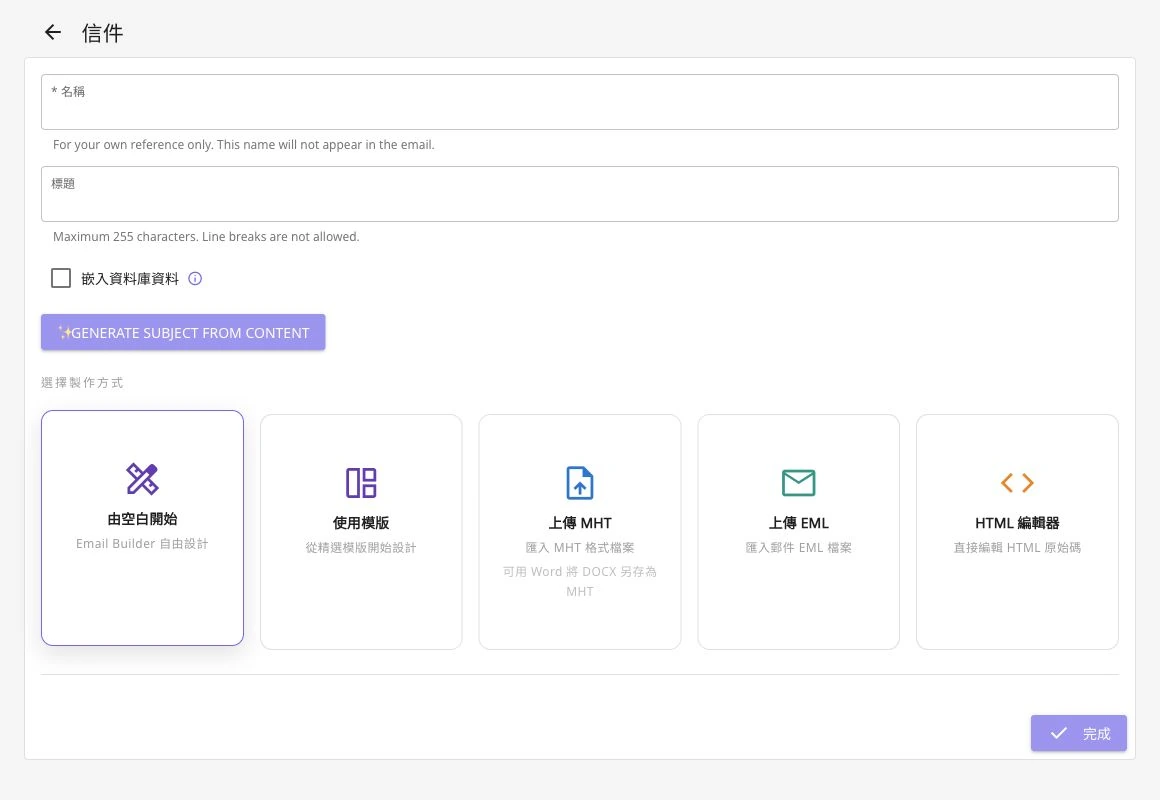
Expand Letter Management → Letter → Add. The current form combines letter details and the content creation method.
 Open full-size screenshot
Letter name, subject and five creation methods - 02
Distinguish name from subject
Name is required and is for internal reference only. Subject is the email subject, with a 255-character limit and no line breaks. Do not send internal notes as the subject.
- 03
Choose a creation method
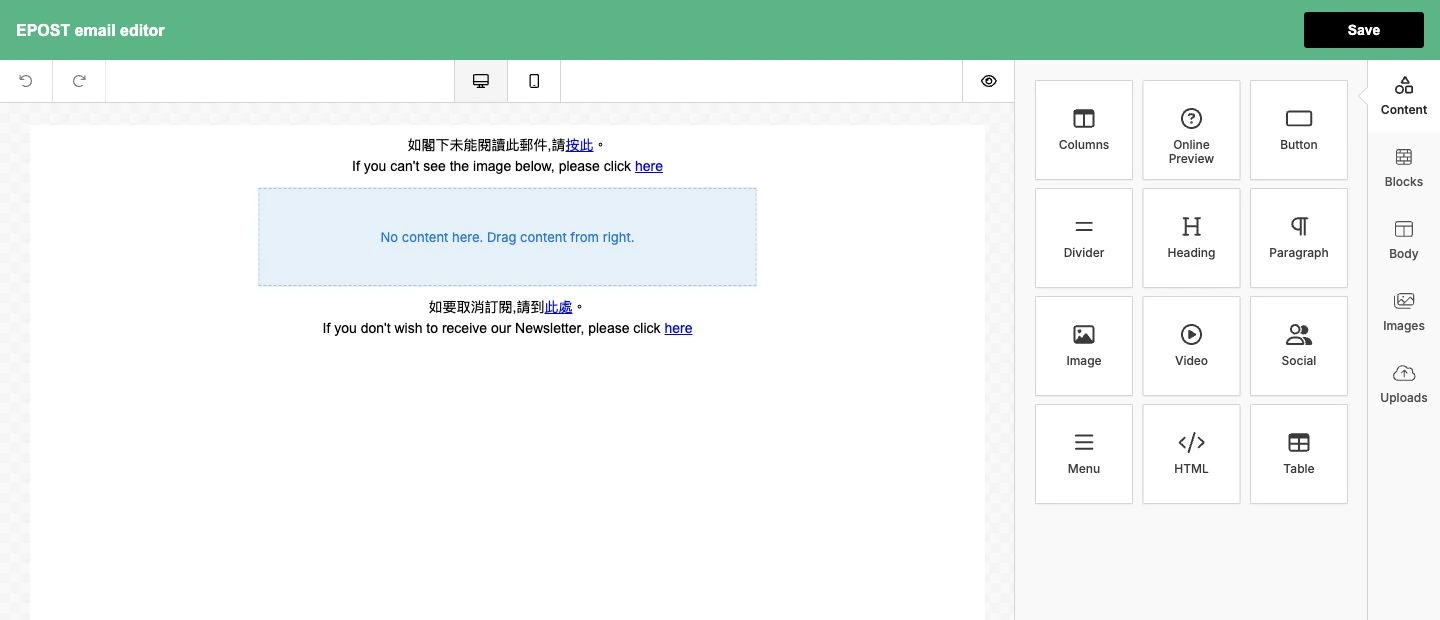
Choose Start from Blank, Use Template, Upload MHT, Upload EML or HTML Editor. Starting from blank opens EPOST email editor in another window; allow that editor if the browser blocks the popup.
- 04
Edit and return to the letter form
Select Save at the top right of Builder and return to the original letter form to check the content. Read the help beside Embedded Database Data before using personalisation fields.
 Open full-size screenshot
EPOST Email Builder content modules and Save - 05
Save and check the list
Check the subject, content, images and links, then select Complete on the letter form. Verify it in Letter → List. Creating a letter does not automatically create a sending schedule.
Notes and troubleshooting
- GENERATE SUBJECT FROM CONTENT may be unavailable without content. Review any generated subject before use.
Need a little more help?
Tell us what you're experiencing.