
Add a schedule
Schedule a prepared letter with the correct time, sender identity and audience.
Platform checked: 2026-11-12 · Guide updated: 2026-11-13Steps have been checked against the live platform. Screenshots are cropped to protect account and customer data.
Before you start
- Prepare the letter, contact group, available email credits and an authorised sender identity.
Step-by-step instructions
- 01
Open Add Schedule
Expand Delivery Management → Schedule → Add. Date and Time contain defaults; change them to your intended sending date and time.
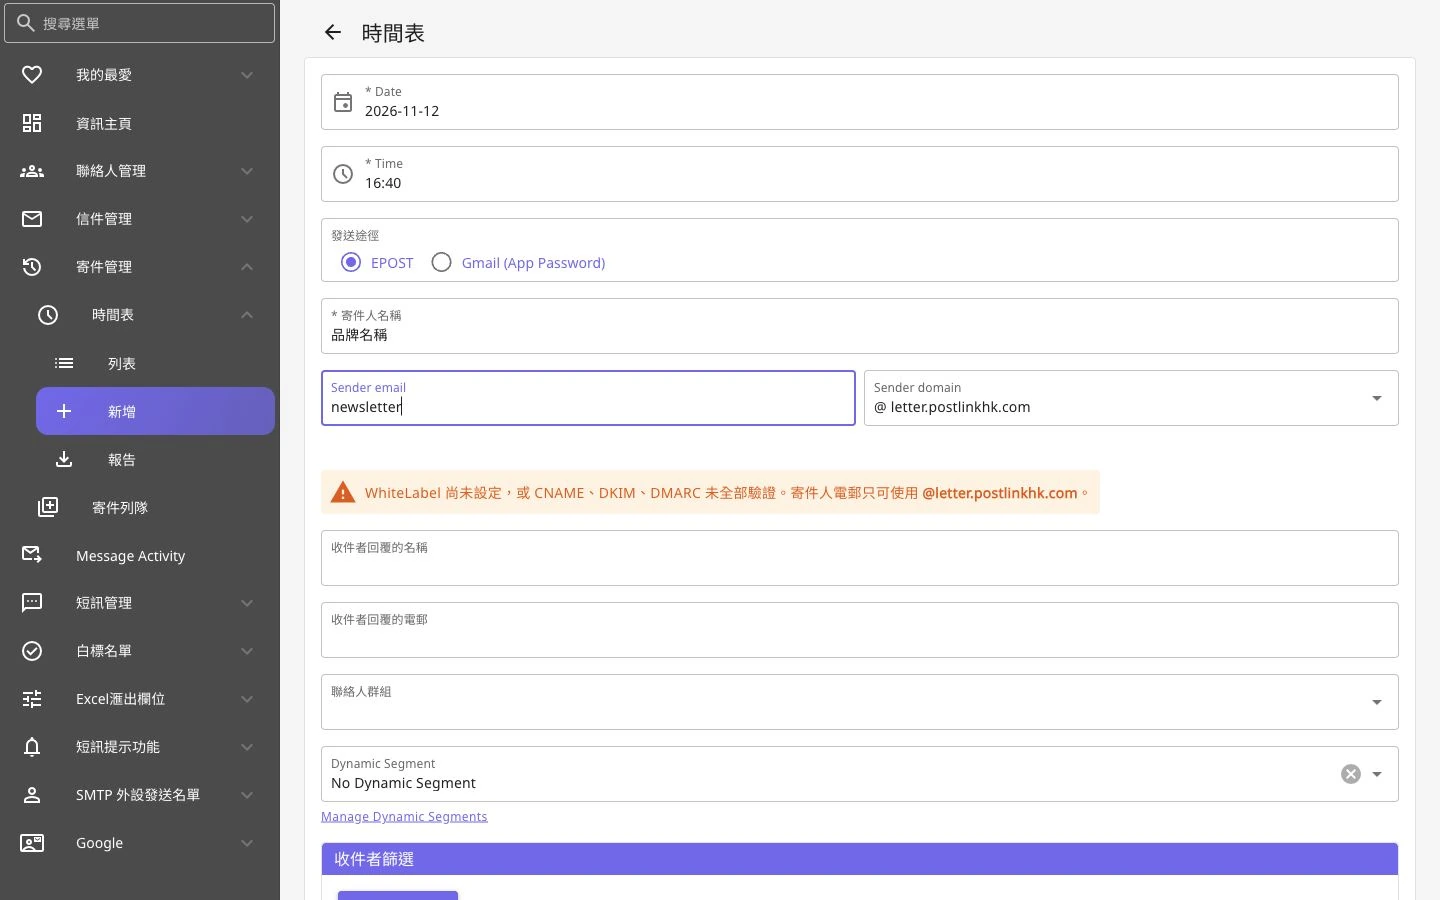 Open full-size screenshot
Schedule date, sender identity and audience settings - 02
Choose the channel and sender
The inspected form offers EPOST and Gmail (App Password). This guide uses EPOST. Enter the sender name, Sender email and Sender domain. Gmail requires its own account setup.
- 03
Check WhiteLabel restrictions
Check the form guidance for permitted sender domains. Without completed WhiteLabel setup and verification, the platform restricts Sender domain. Do not assume an unverified custom domain is ready.
- 04
Set replies and the audience
Set the reply name and email if required, then choose Contact Group. Dynamic Segment and Recipient Filters further narrow the audience; use them only when you understand the conditions.
- 05
Choose the letter and confirm
Choose a saved letter in Select Letter and use GRID / List and Preview to inspect it. Recheck the time, sender, group and letter. Complete creates a real schedule and should not be used casually for testing.
- 06
Follow up in the schedule list
After creation, review the arrangement in Schedule → List. Do not infer the timezone from the default time alone. For cross-timezone work, confirm how the displayed time maps to delivery.
Notes and troubleshooting
- Only the form and an illustrative sender name were inspected. No schedule was created, started or modified.
Need a little more help?
Tell us what you're experiencing.