
Add a contact group
Create clearly named groups before organising imports and campaign audiences.
Platform checked: 2026-11-12 · Guide updated: 2026-11-13Steps have been checked against the live platform. Screenshots are cropped to protect account and customer data.
Before you start
- Use only contact data you are authorised to process for the intended communications.
Platform entry Platform screenshots use Traditional Chinese; follow the control names in this guide.
Step-by-step instructions
- 01
Open Add Contact Group
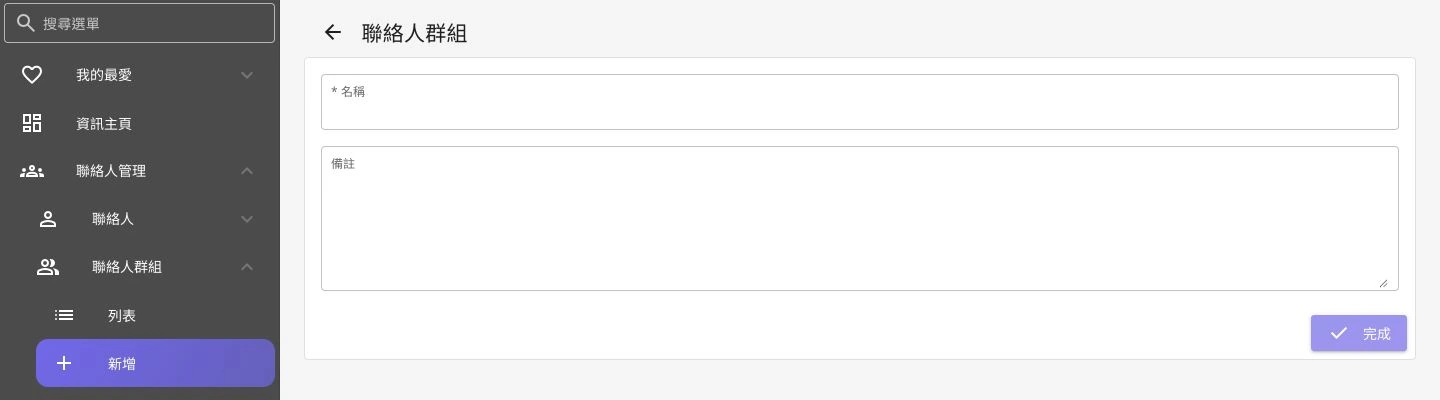
Expand Contact Management → Contact Group → Add.
 Open full-size screenshot
Name and Notes fields for a new contact group - 02
Enter the name and notes
Name is marked with an asterisk and is required. Use a name that identifies the source or purpose, such as Website Product Subscribers, and add context in Notes.
- 03
Save and check the list
Select Complete after reviewing the details. Return to the Contact Group list and check the name to avoid creating near-duplicate groups.
- 04
Add contacts to the group
Choose the group in Contact → Add, or use the import wizard. Import Preview also lets you choose an existing group or create a new one.
Notes and troubleshooting
- A group organises contacts; creating one does not establish marketing consent.
Need a little more help?
Tell us what you're experiencing.